Bless my life, that I’m so fit as to be able to manage it all! I have sort of a moment, in between a gazillion activities, and I need to make a blog post. I’ll start with an easy one: Easter egg coloring. I’ve got two, actually: because I coloured eggs with my girlfriend Margaret as well. But this one has less photos and is a shorter story, and I need to put something up so I can get on to other work.
But look:

I’m working on the latest version of Talking Leaves, the Cherokee newsletter I have edited for the past decade almost. One of our regular contributors is an apothecary, Diana, who writes this time about natural dyes. It reminded me that long ago, Kellen and I dyed eggs with onion skins. They came out so stunningly beautiful that I wanted to use the old photos to illustrate Diana’s article.
I searched but could not find a photo from years ago. That meant I had to create a new one. I took photos at multiple stages, to show others what I was doing. I had no idea how these would turn out, since I had only used this method one time, years ago. I was lucky and they turned out beautifully.

I had a few onion skins. If you want to try this, keep the dry skins from your onions. I felt as though I didn’t have enough at first, so I went to the store and bought two more onions, but while I was there, I dug through the bins and collected all the skins that had fallen from other onions. I used skins from sweet, yellow, and red onions.
You can dye eggs using onion skins in two ways. You can make a dye bath by placing the onion skins (or whatever natural dye you are using) into the water and simmer until all the colours are released and you have a richly coloured water. Then dunk the eggs. Unlike the synthetic dyes, natural dyes take longer to work. So if you dunk your eggs, you’ll need to either place raw eggs into simmering dye bath for 15-20 minutes, or place already-boiled eggs into a cold dye bath overnight.
I used the other method, which is to wrap the eggs in onion skins and place the raw, wrapped eggs into clear boiling/simmering water for 15-20 minutes. To keep the skins in place, you’ll need to wrap them. A loose wrap will ensure that the entire egg gets covered in colour. But to get the results you see above, I had to use a very tight wrap – to prevent the onion skins from moving at all.
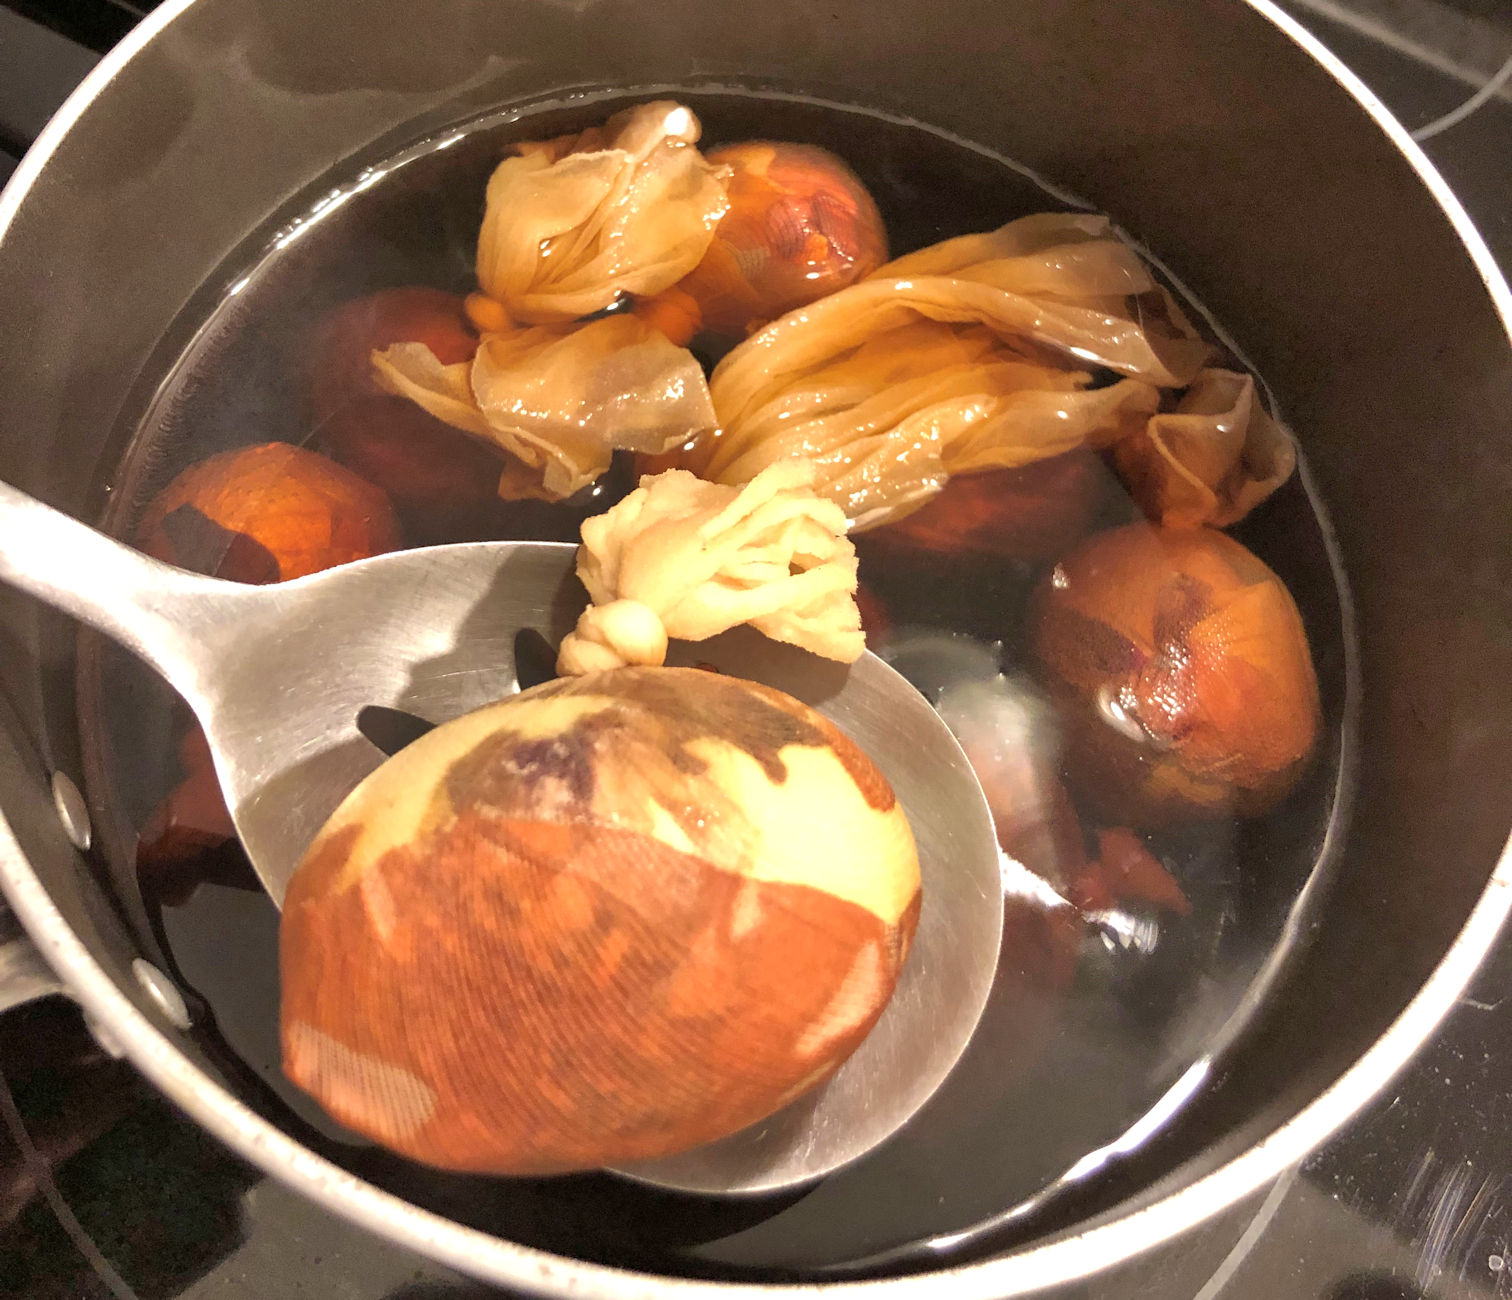
I used an old pair of nylons, and cut them up. These work brilliantly. It’s a little tricky, but try to have onion skins covering every bit of egg inside the wrap. Use different shapes and sizes of skin pieces and let them wrap around in different directions. Wrap very tightly, because the water will loosen the skins and the wrap. Place the eggs in gently and keep water at a low boil or simmer for 15-20 minutes. Don’t stir them. Don’t fuss with them, or you could move the skins around. Turn off heat and let them cool. I took them out of the pot with a slotted spoon.
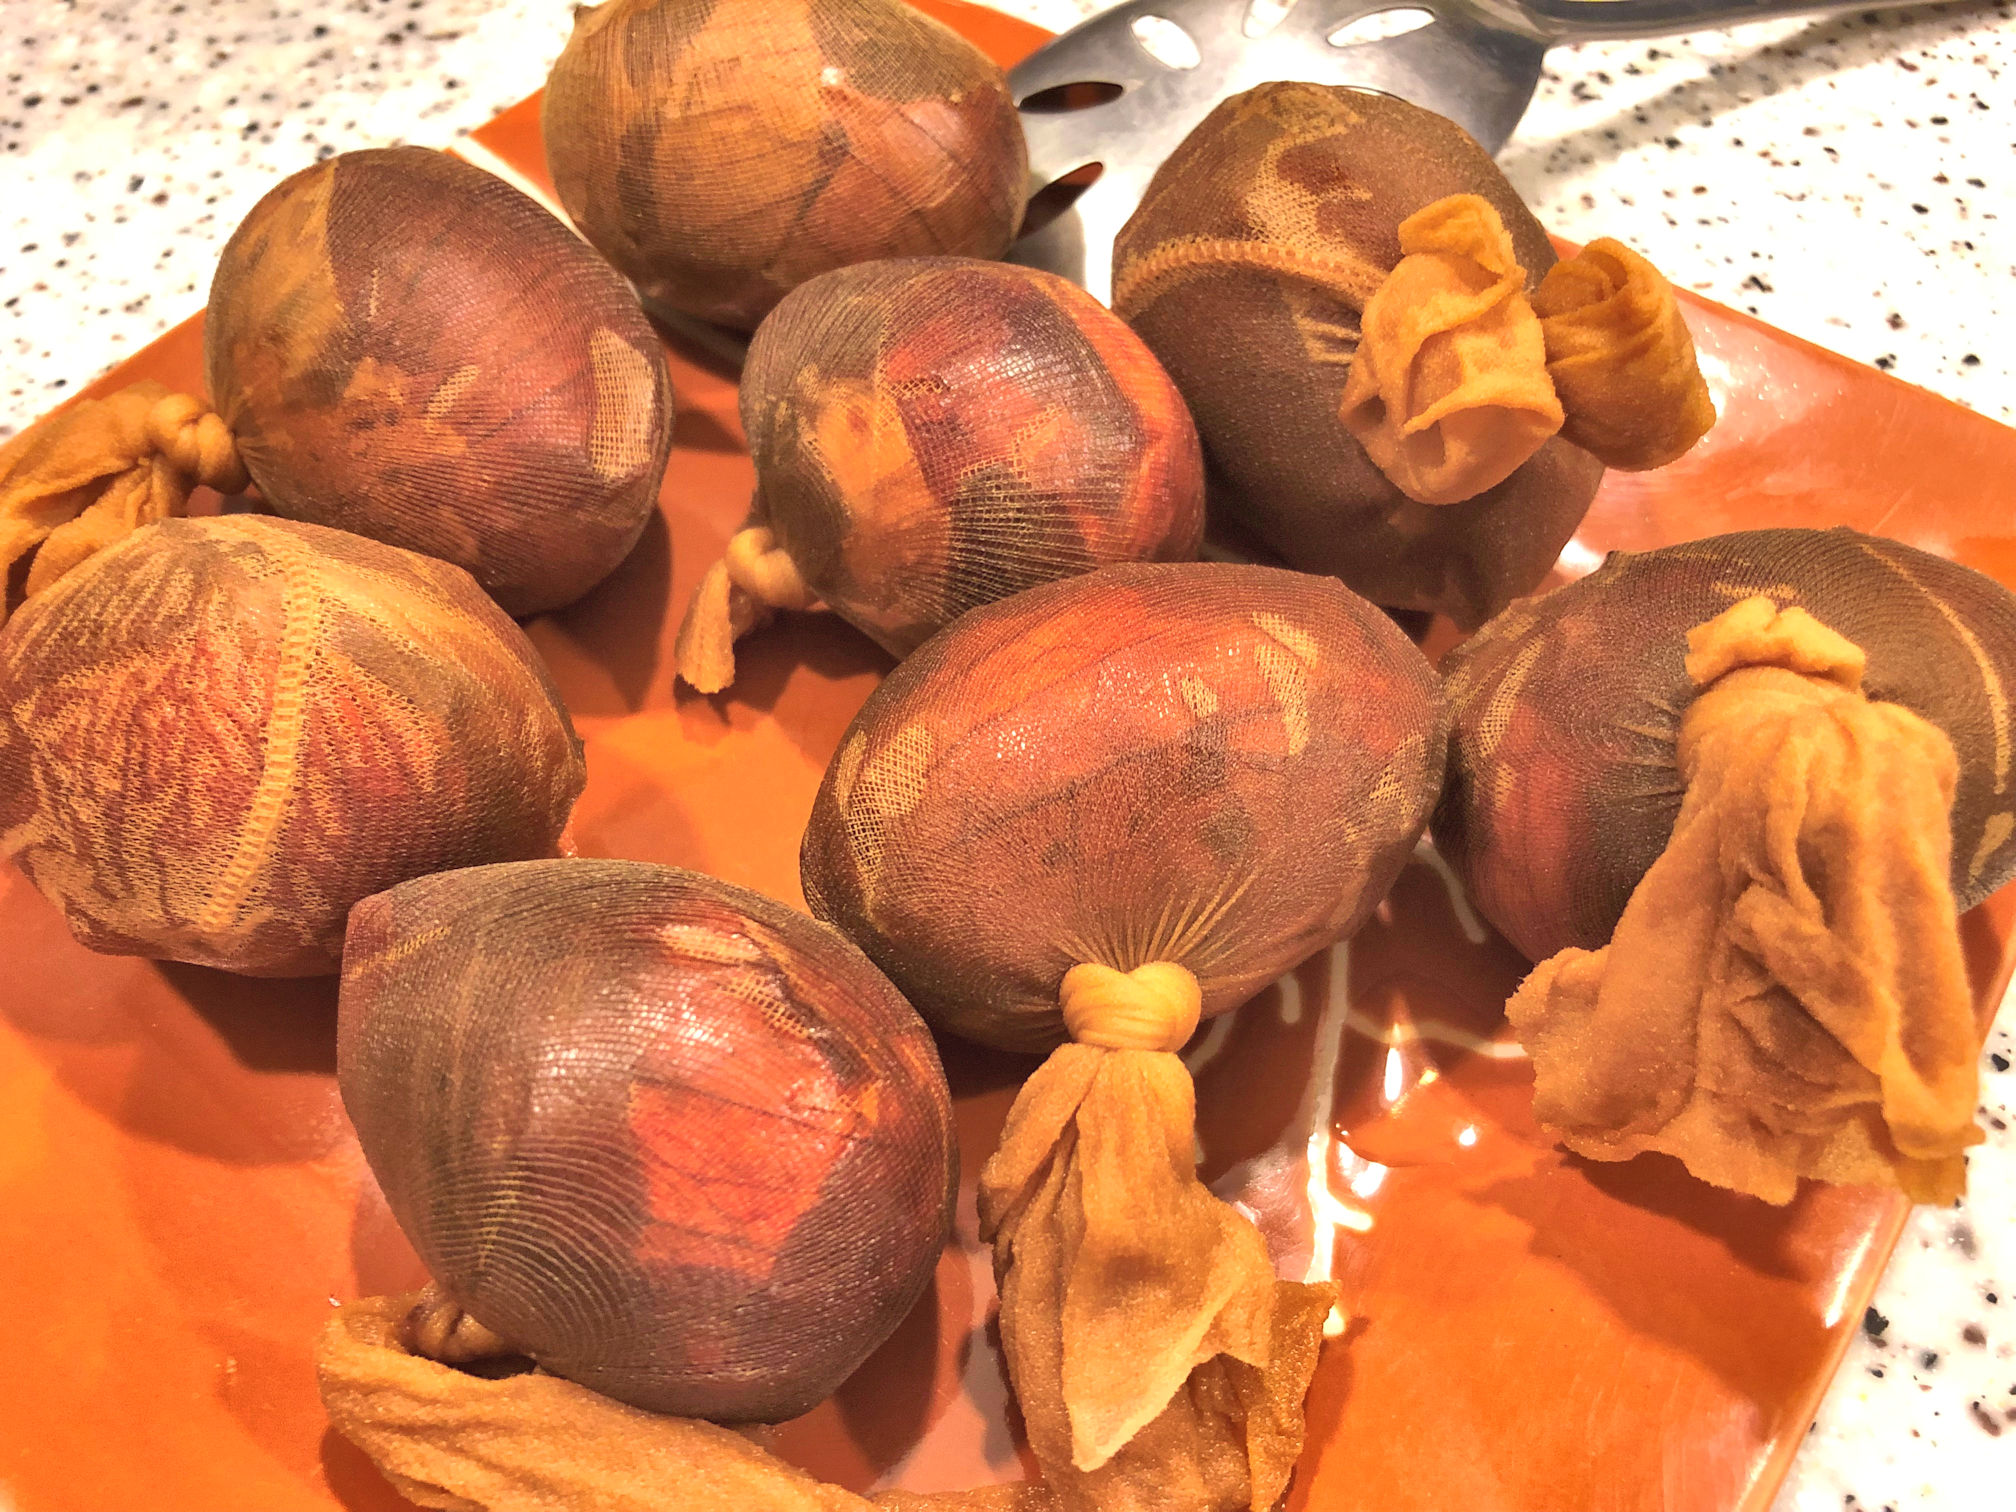
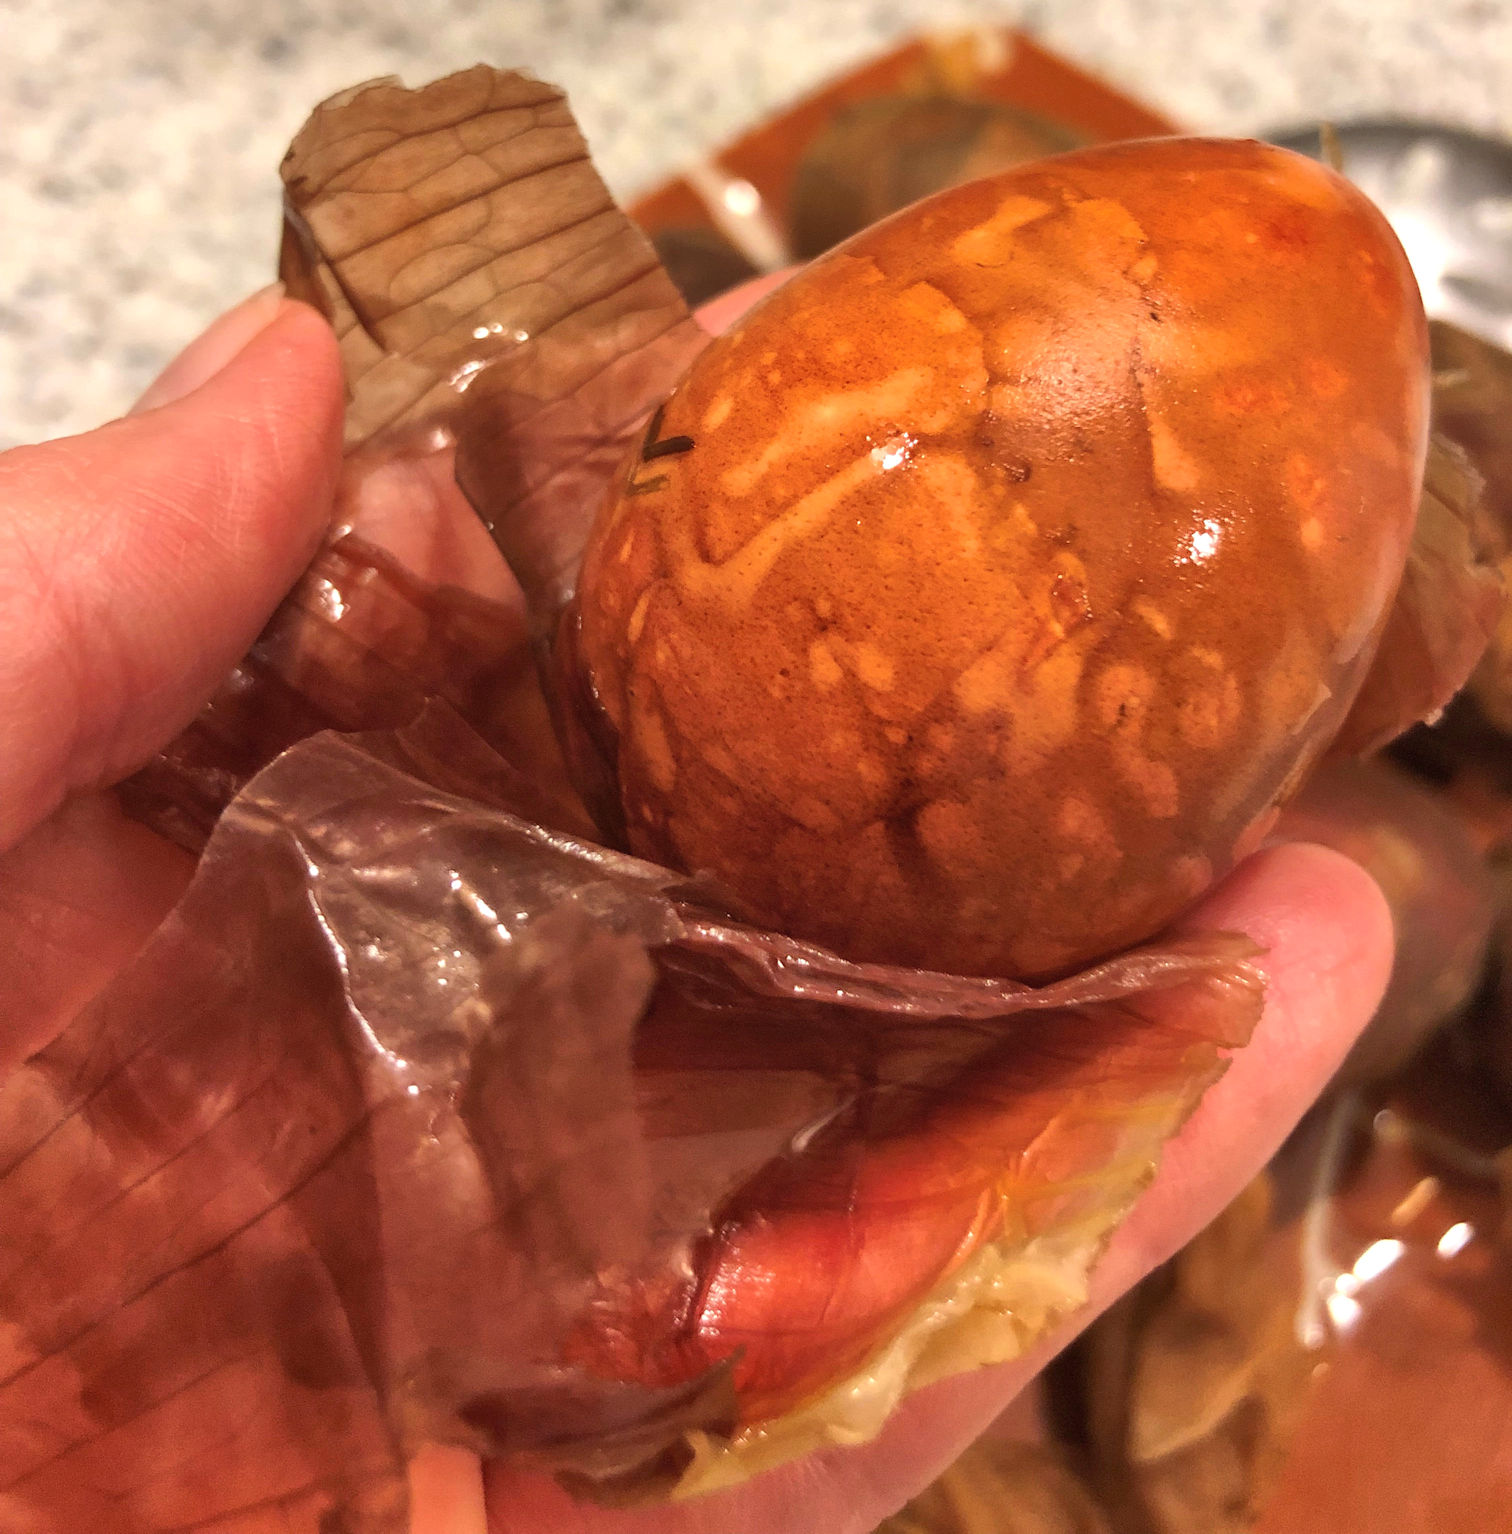
When they were completely cool, I used scissors to cut off the wrap, and gently removed the onion skin. At this stage, the outer shell is delicate, and will rub off. Also the dye is not set and will rub off. So touch the eggs as little as possible.
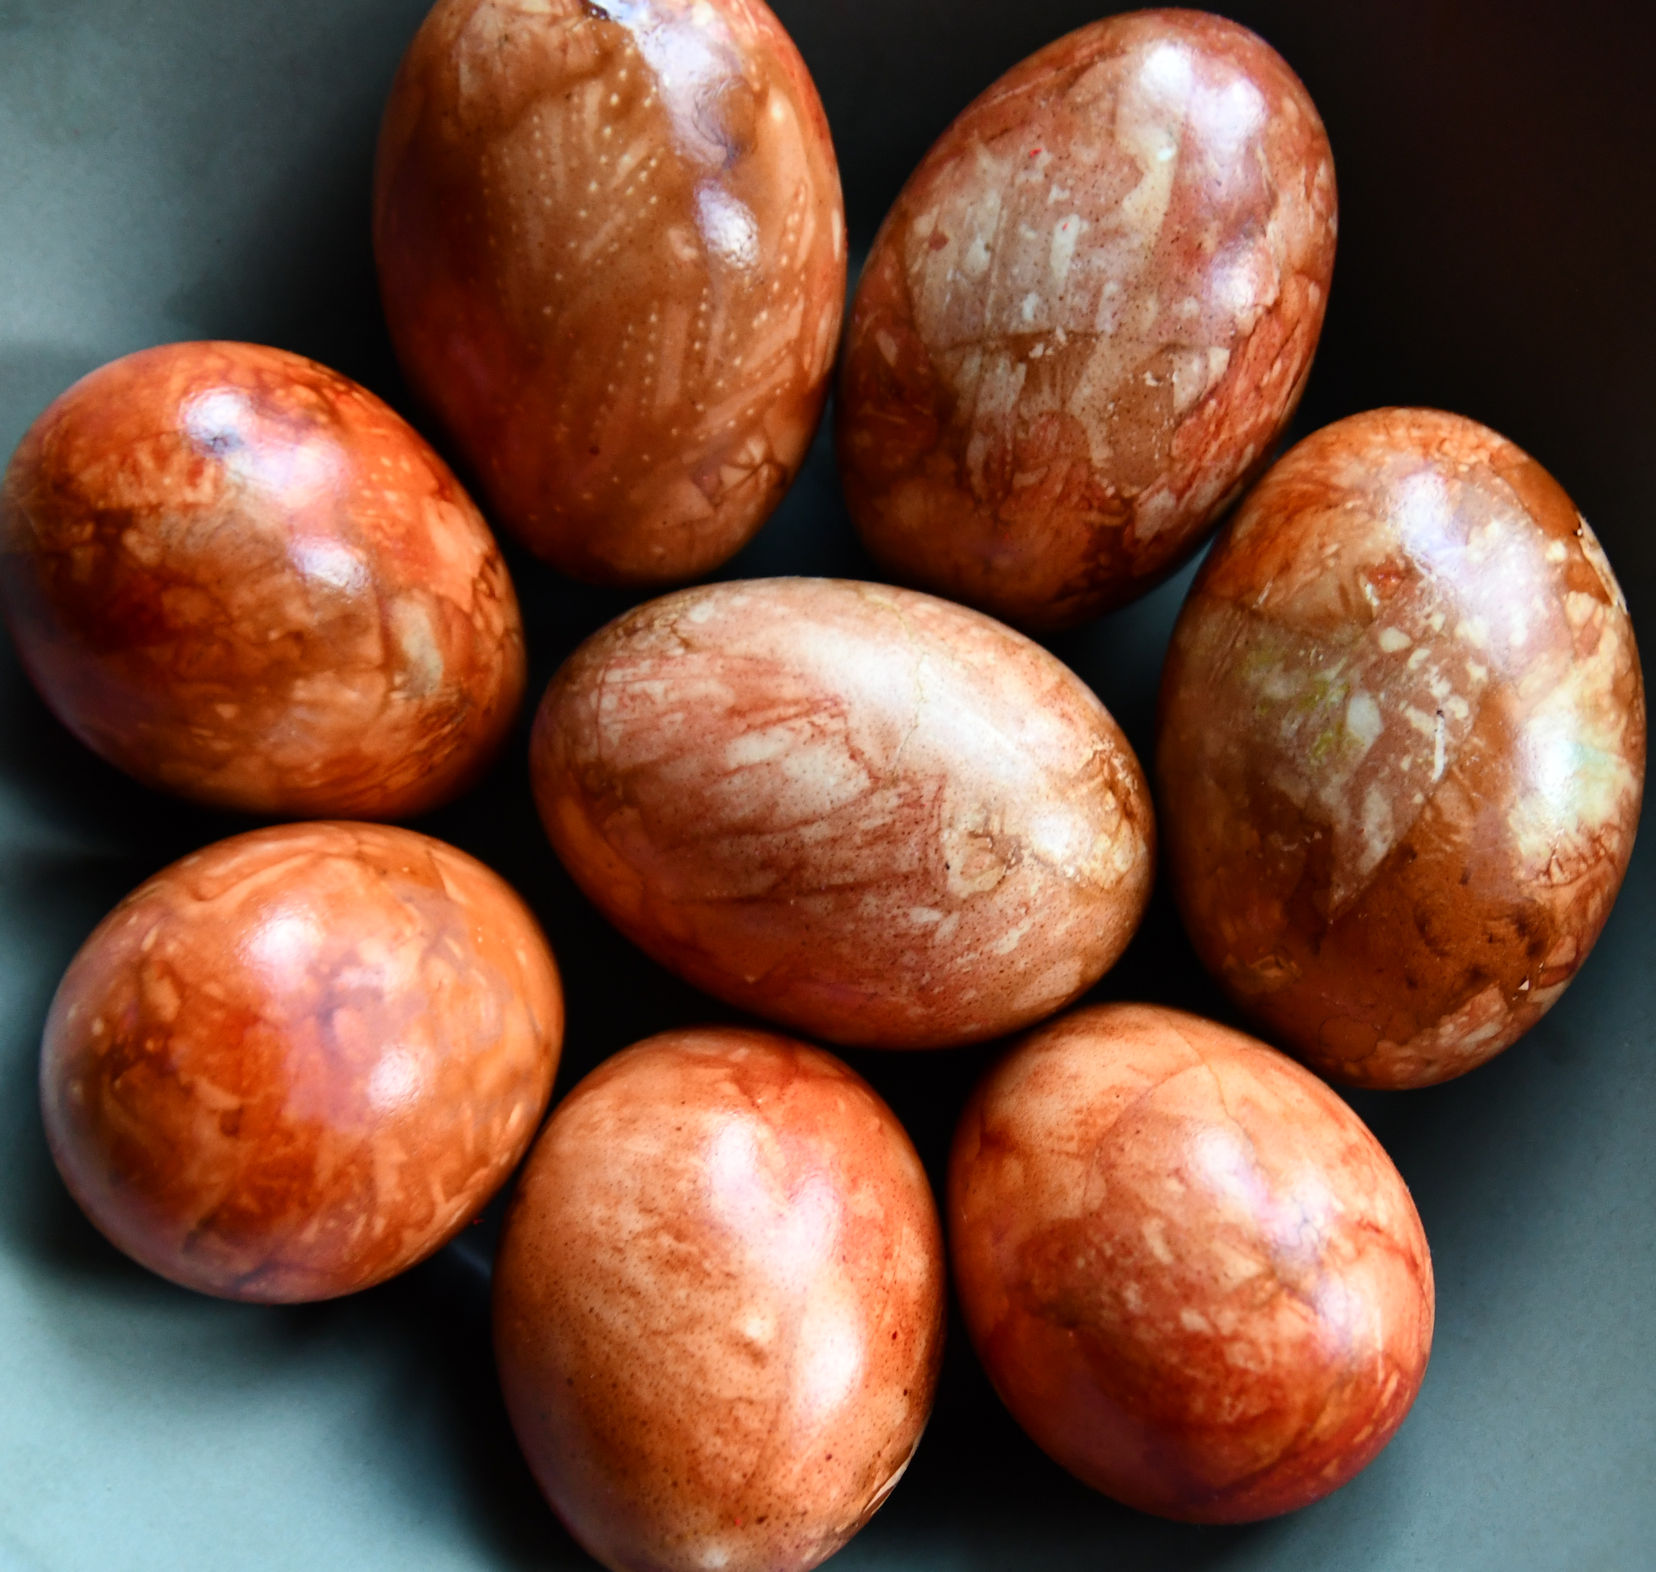
Once again, place the eggs on a plate, and put the plate into the refrigerator to keep the eggs fresh while they cool and dry. I let them sit overnight to resist the temptation to handle them.
The next morning I took out the dry eggs with dye fully set and was able to brush off any remaining pieces of onion skin. I used a tiny bit of olive oil and rubbed it over the outside of the eggs to make them shiny again. Like getting a stone wet, this serves to bring out the deeper hues of the dye on the calcium shell.

Cedar is important to Cherokees (and other people) and I have cedar on my property. Since I was creating photos for the Talking Leaves newsletter, I picked off a couple of branches for two of the eggs, and wrapped the cedar against the egg shell, then wrapped onion skin around it. Again, the wrapping must be very tight to hold this in place during the simmering process.

You can use tiny leaves, grass, seeds, rice, string, or whatever comes to mind, instead of a cedar sprig. I saw an example of this method using rice, and I loved it. It turns out similar to the image in the above photo, and wherever there was a grain of rice, a tiny white spot is left. Only, I was in a hurry, and couldn’t think of how to keep the rice in place while I wrapped it. Maybe you have an idea.
And that’s it. The process is not difficult or expensive, but it is time consuming. Easter is April 9th, so we still have time for trying natural dyes. There are LOTS of other dye ideas, and they are only a few clicks away on the Internet. In my next post, I’ll show you what results we came up with when Margaret showed us two new dye methods.
I posted all these images on Facebook, and Ieva from Lithuania said this is a traditional dying method there, and Manja from Slovenia said the same thing.

Beautifully done
Thank you, Derrick! It was a fun experiment.
These are fantastic! (Now if only one can find eggs!) It looks l8ke a wonderful project and I may have to try the cold bath, overnight version. Hopeful that my life settles down a bit in April but this looks like a wonderful project anytime. Thanks. Sooo creative. I love it!
I stockpiled a little before winter from my own hens, and was so fortunate to never have to buy eggs during this eggs-in-commerce episode. In the last week, a couple of my hens have decided to lay again, so I think I’m going to make it through without going to a store for eggs. Yay!! I hope your life settles down, too. Make sure you are getting outside now and then. ❤