
We pick up at the scene above, which is where I left you at the end of Part I of the new back yard office story. I was proud of my work on the wisteria. Not only did I get most of that enormous plant chopped down, but I kept my favourite parts of it. I had the idea of saving the great big wisteria stalks, and using them like tree trunks to hold a bushy wisteria at the top, that I planned to guide and train into something more organized. I measured carefully, and my new Tuff Shed would fit in the space.
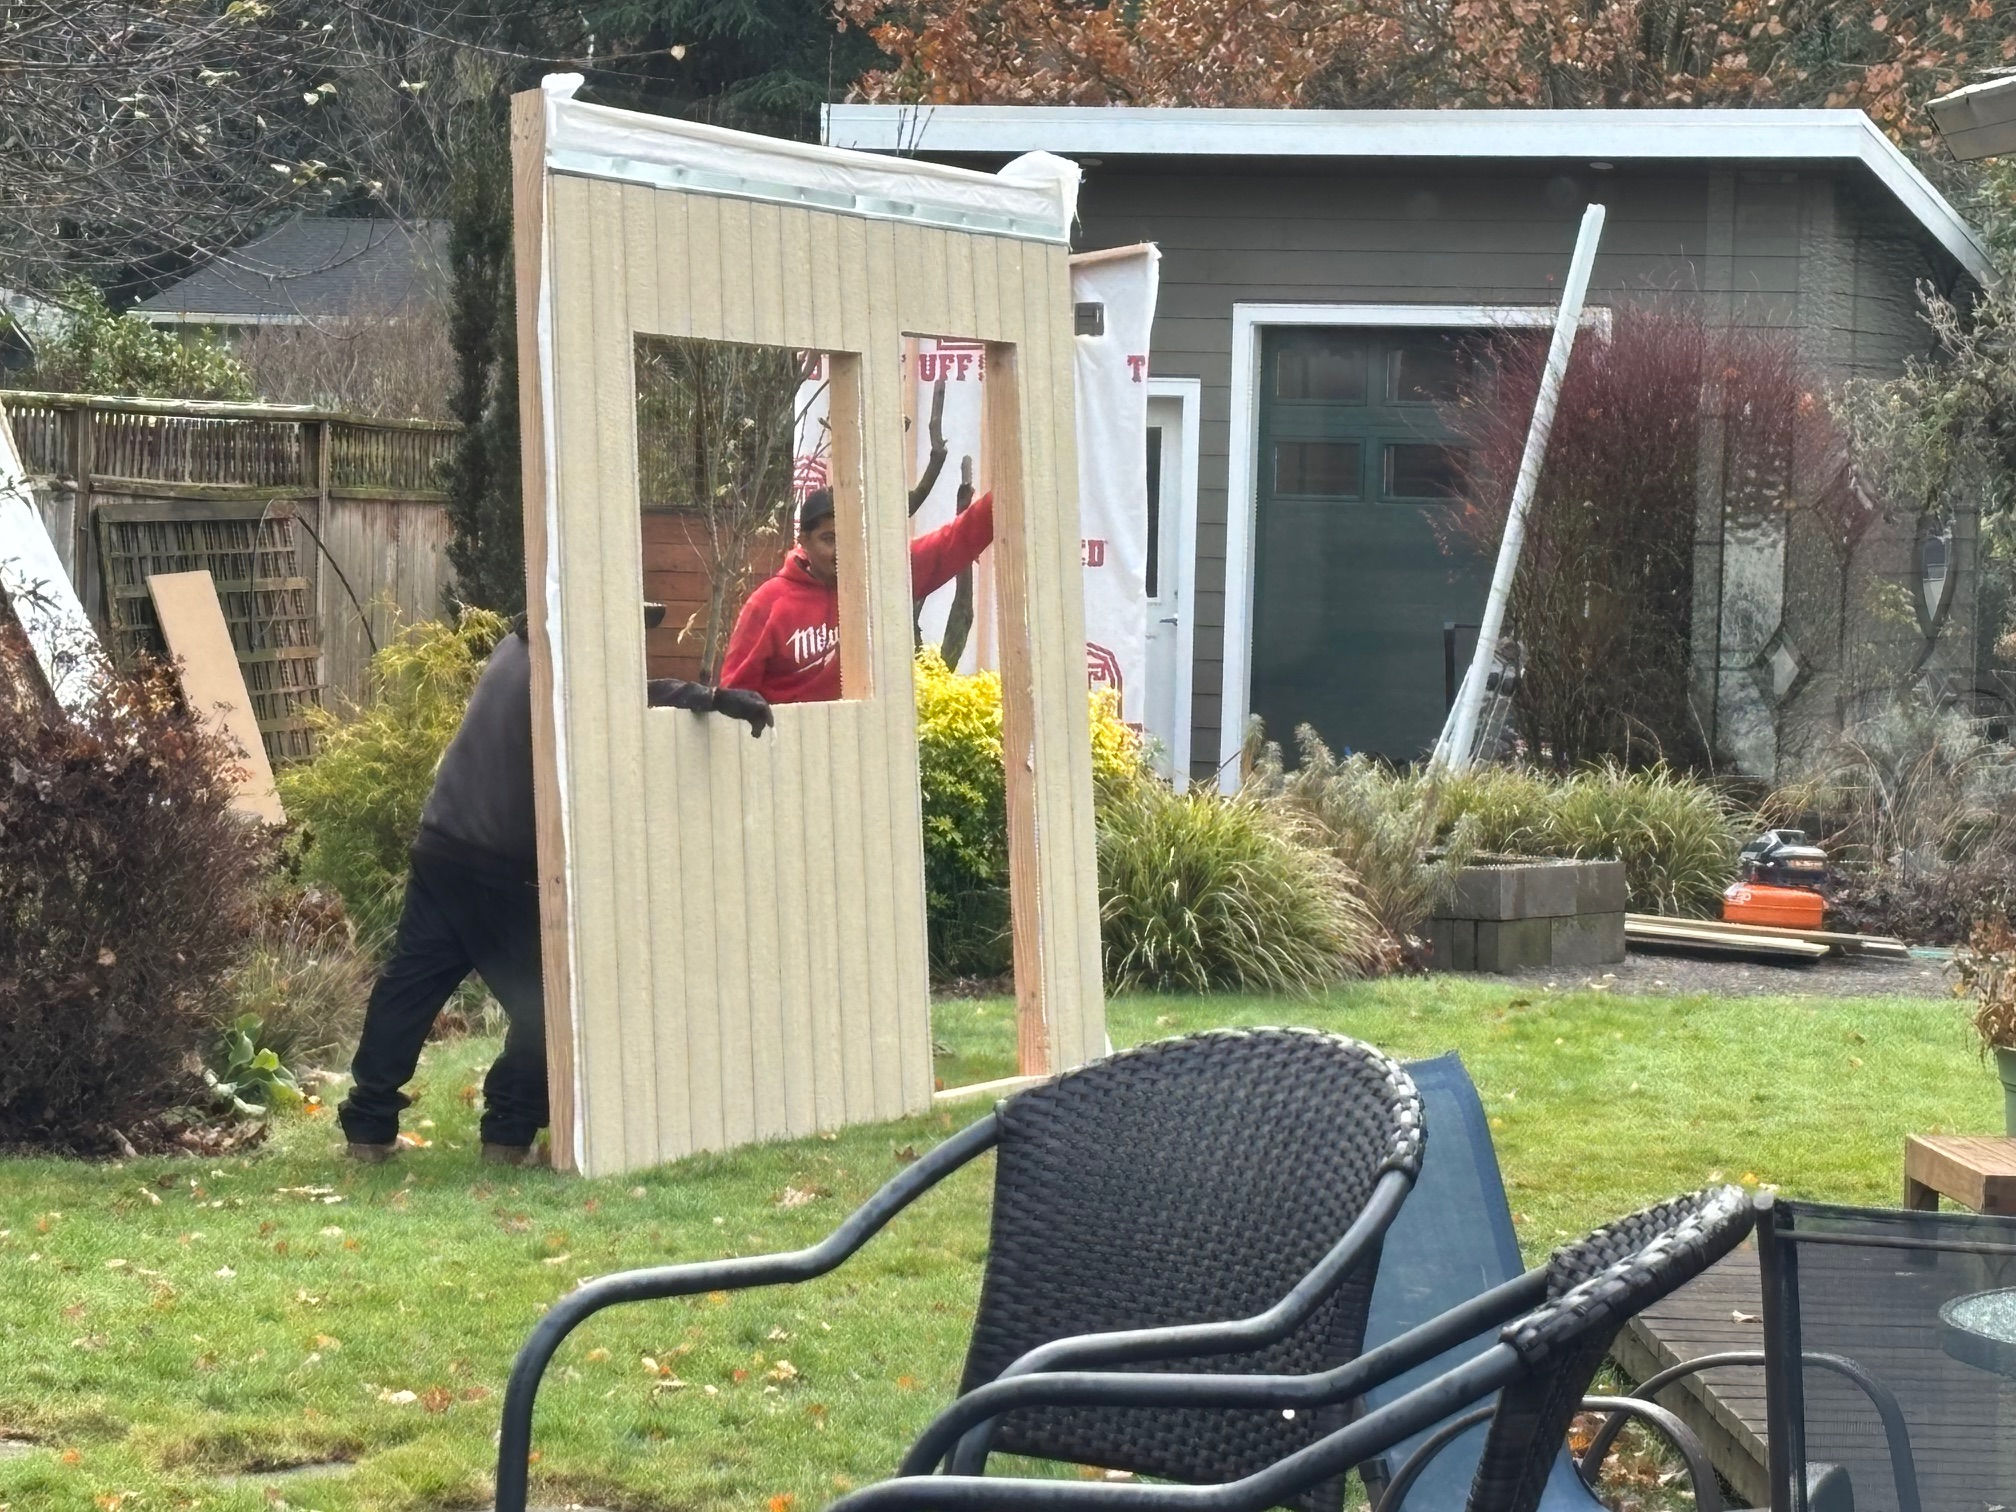
The walls of the structure were pre-built to my order, and hauled to our place on a flatbed truck. Two guys carried all the stuff into the back yard and asked me to confirm where I wanted it. I showed them the space. I was a little concerned about one of the wisteria trunks with a crooked elbow reaching into the construction area. I put my hand on that particular trunk and showed them the way it curved into their work space. “If this (I put my hand on the crook in the trunk) is in your way, it’s ok to cut it back.”
They nodded, then got to work and built the place.

It wasn’t until they cleaned up all the building materials and left that I noticed what had been done to the wisteria.

I am disappointed about the wisteria. I don’t blame the guys. I wasn’t super clear that I was only talking about one trunk, not the whole plant. I never explained to them that I had high hopes for this plant, which they probably thought was dead. They might even have thought they were helping me out by cutting it down to size. I will still be able to use the short trunks, so maybe it will be just fine when all is said and done.
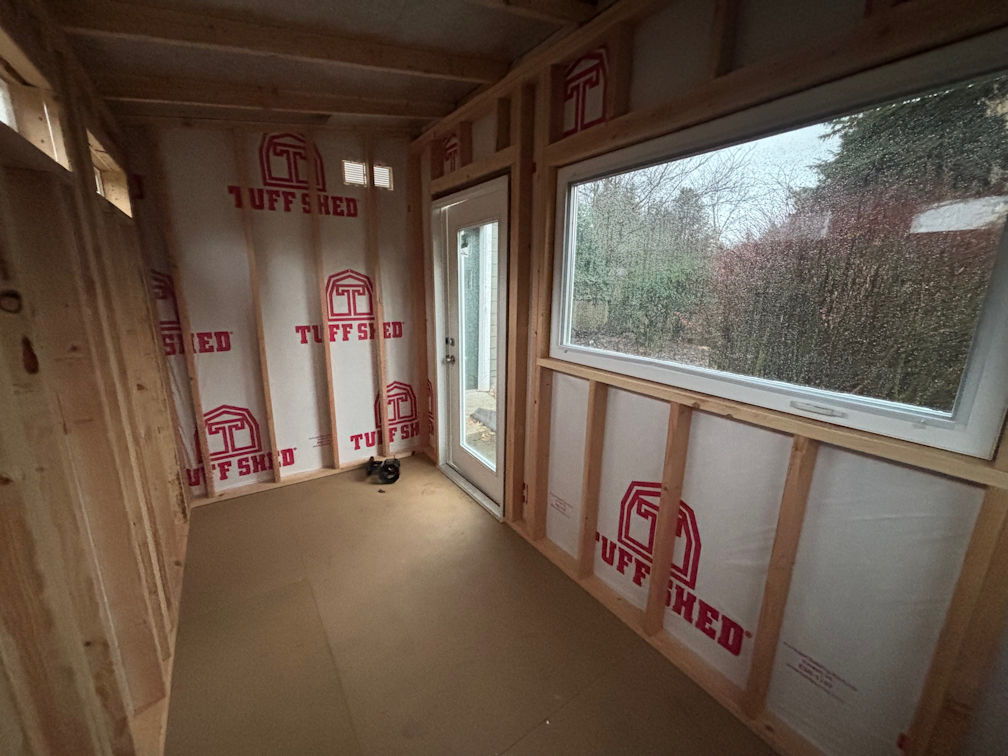
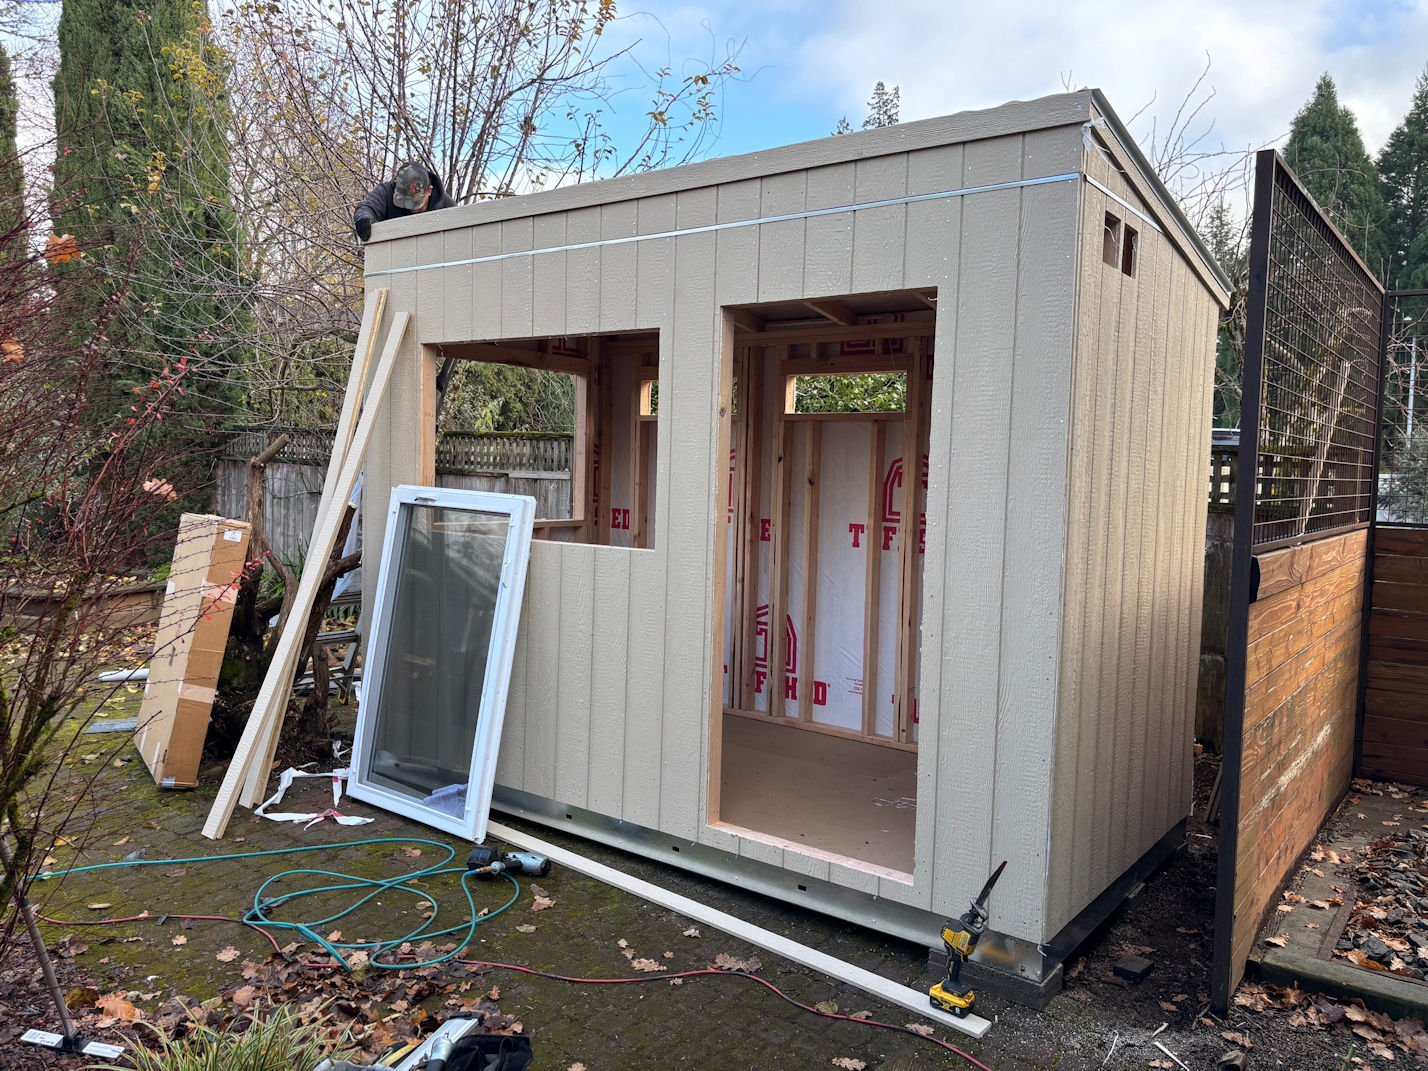
I had special ordered windows and a door to let in as much light as possible. The back wall, which faced a fence, but also looks right onto the neighbor’s house, has small windows that will let in morning sunlight, but not curious gazes. We were pleased that Igor, the electrician who worked on Pedro’s work shop, was willing to do this project as well. He ran power underground from the workshop to the office.
At this stage, Pedro and I left for our trip to New Zealand. No work was done while we were gone. As soon as we got home, I messaged our contractor and asked him to get to work as soon as he could fit us in. It didn’t take long.
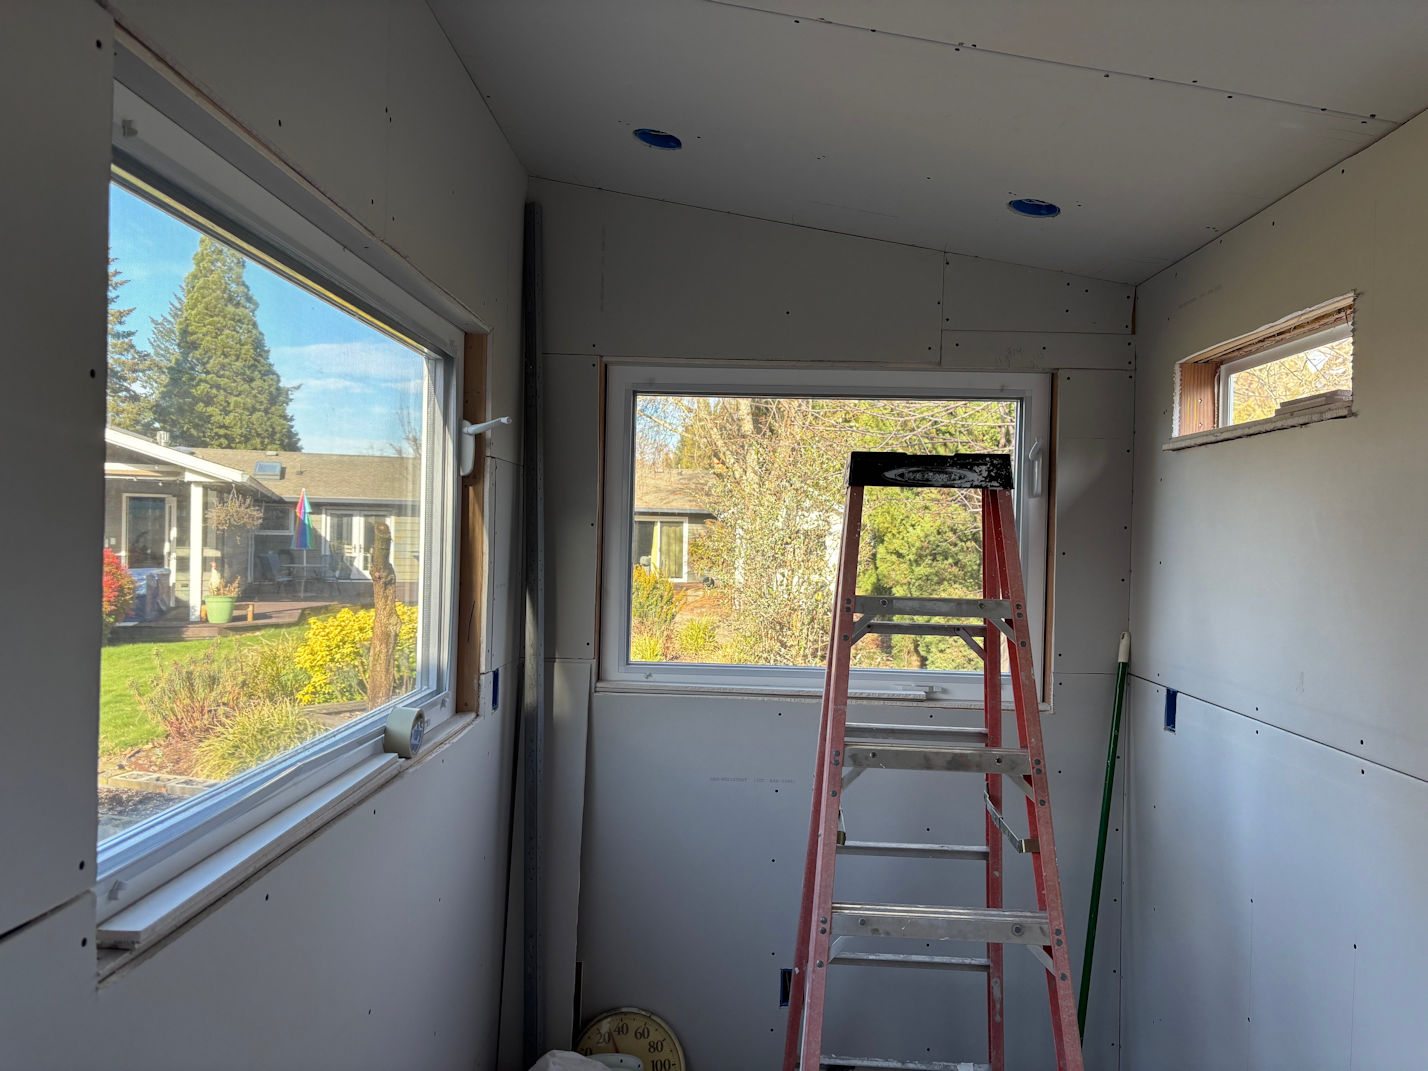
During a frigid but brilliantly sunny week in January, we got the wall and ceiling insulation put up in one day. The sheetrock, then filling and patching and smoothing and then wall texture took three days.
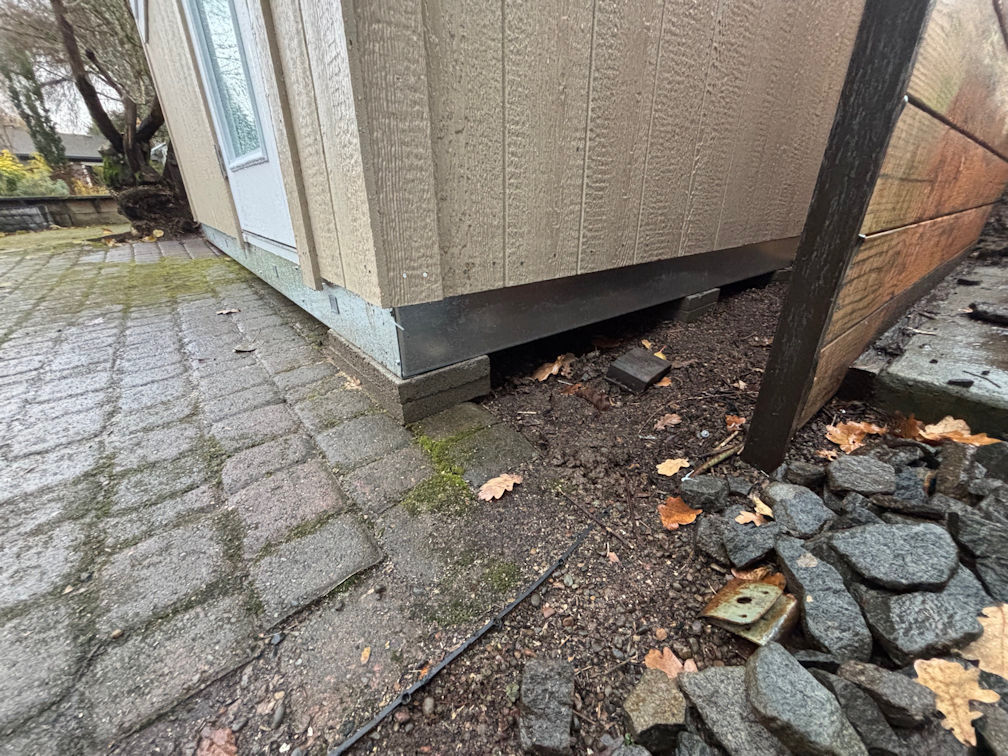
I waited a couple of days for the sheetrock, plaster, and texture to dry, but it was very wet. The temperature outside had been below freezing for most of a week, and the stuff simply wasn’t drying out. So in the last 48 hours before the rains were due to return, I painted the outside of the building to match the main house, and the workshop.
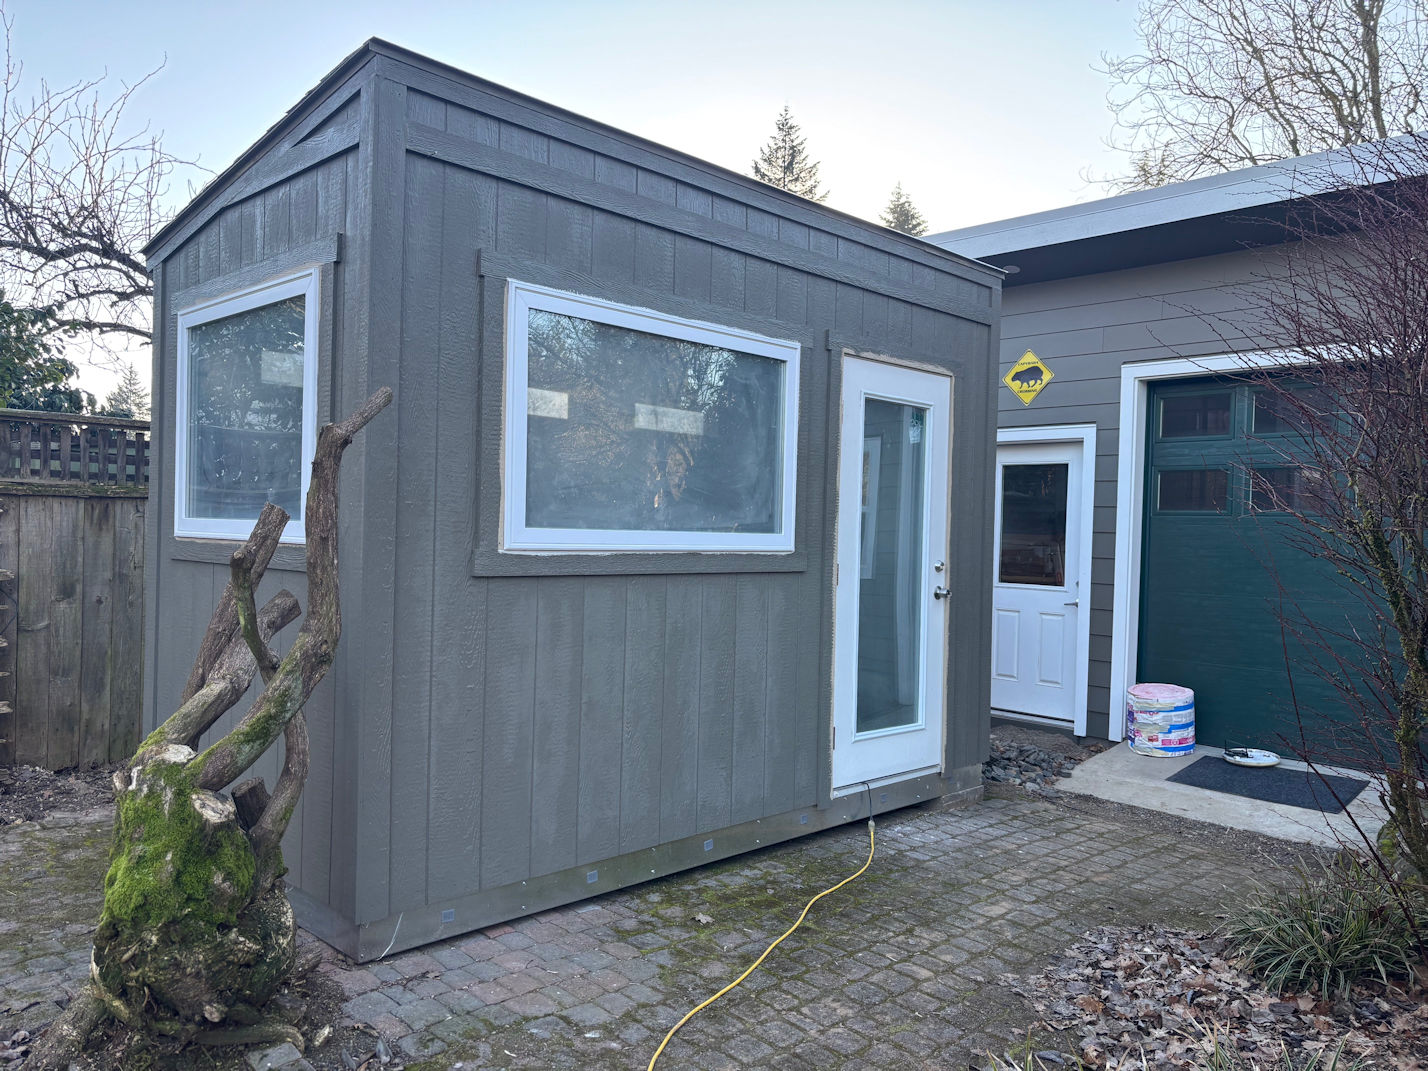
I managed to apply two coats of grey paint, but the second coat had only hours on the walls before the rains began again. Some of the paint washed off the walls and onto the bricks. D’oh! It rained and rained and rained after that, so I gave up on the outside.
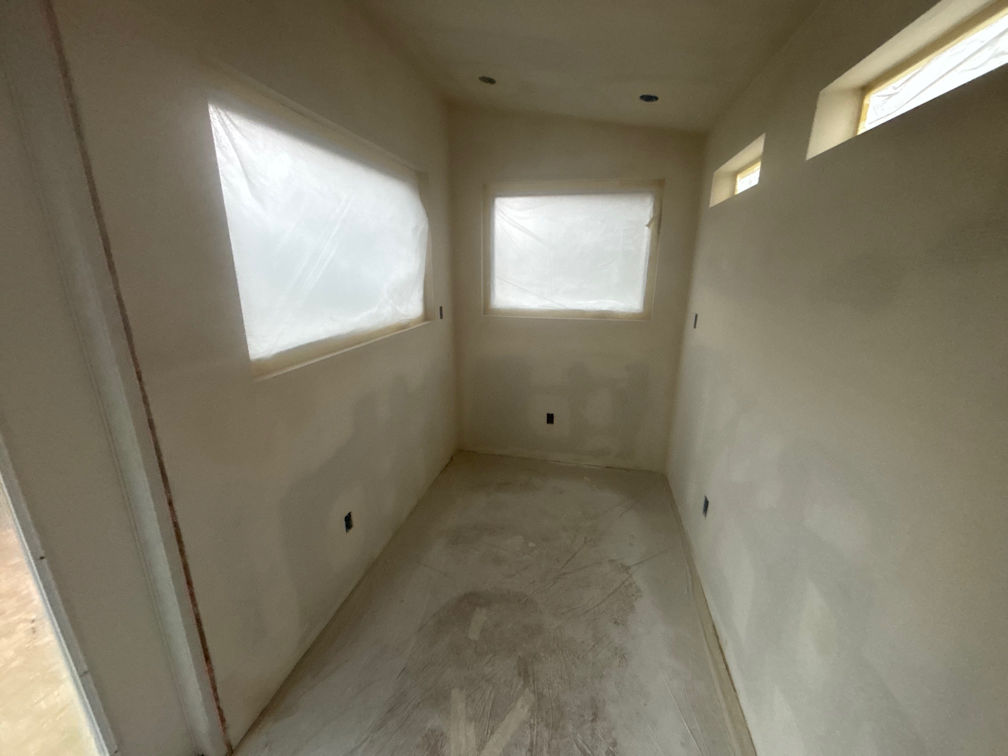
The inside was still sopping wet. A week after the sheetrock was done the walls were still damp. The floor was supposed to go in, but I wanted to paint first. I couldn’t paint until the walls dried. I got desperate and bought a de-humidifer and ran an extension cord out there. Pedro found a little space heater in storage. I ran them alternately for another four days, dumping out cups and cups of water from the dehumidifier. Finally, the walls were dry!
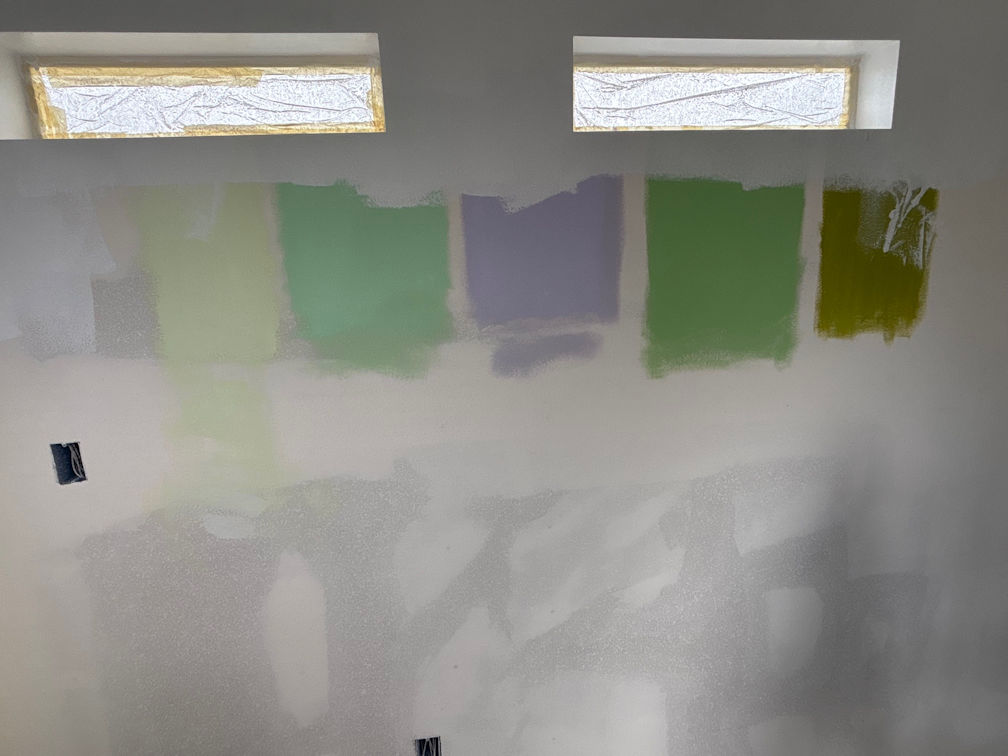
I began with the four colours on the right. Of those four colours, I thought the lighter green (second from the left in the photo above) would be my main wall colour. The rest will be accents on the trim, to make it very colourful in there. Painting patches on the wall before I commit allows me a better sense of how it will look. This time, that green I thought I wanted made me think of a hospital, which was no good. That’s when I picked up the colour on the far left.
I painted a layer of white primer on everything first.
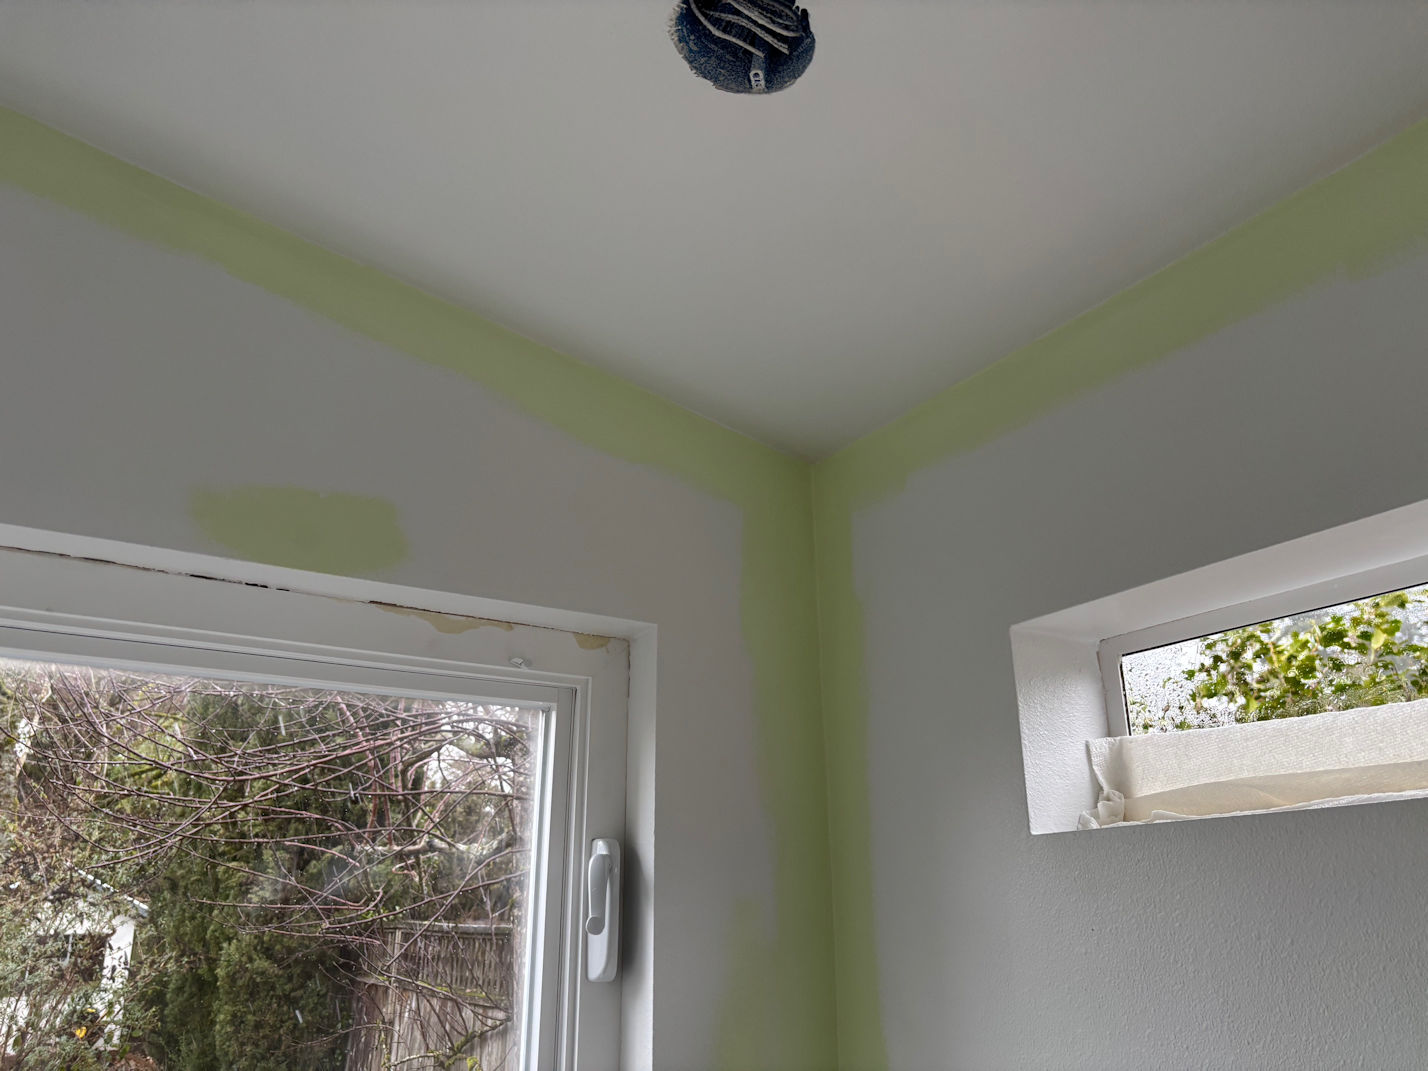
After two coats in the corners using a brush, I switched to a roller and a pan, and put two coats on the walls. Each time I put on more paint, the windows instantly fogged up and I had to run the dehumidifier again. In the photo above, you see paper towels in the windowsill, where I was sopping up the condensation. I alternated the space heater and dehumidfier for a few more days, then told the contractor it was finally ready for a floor.
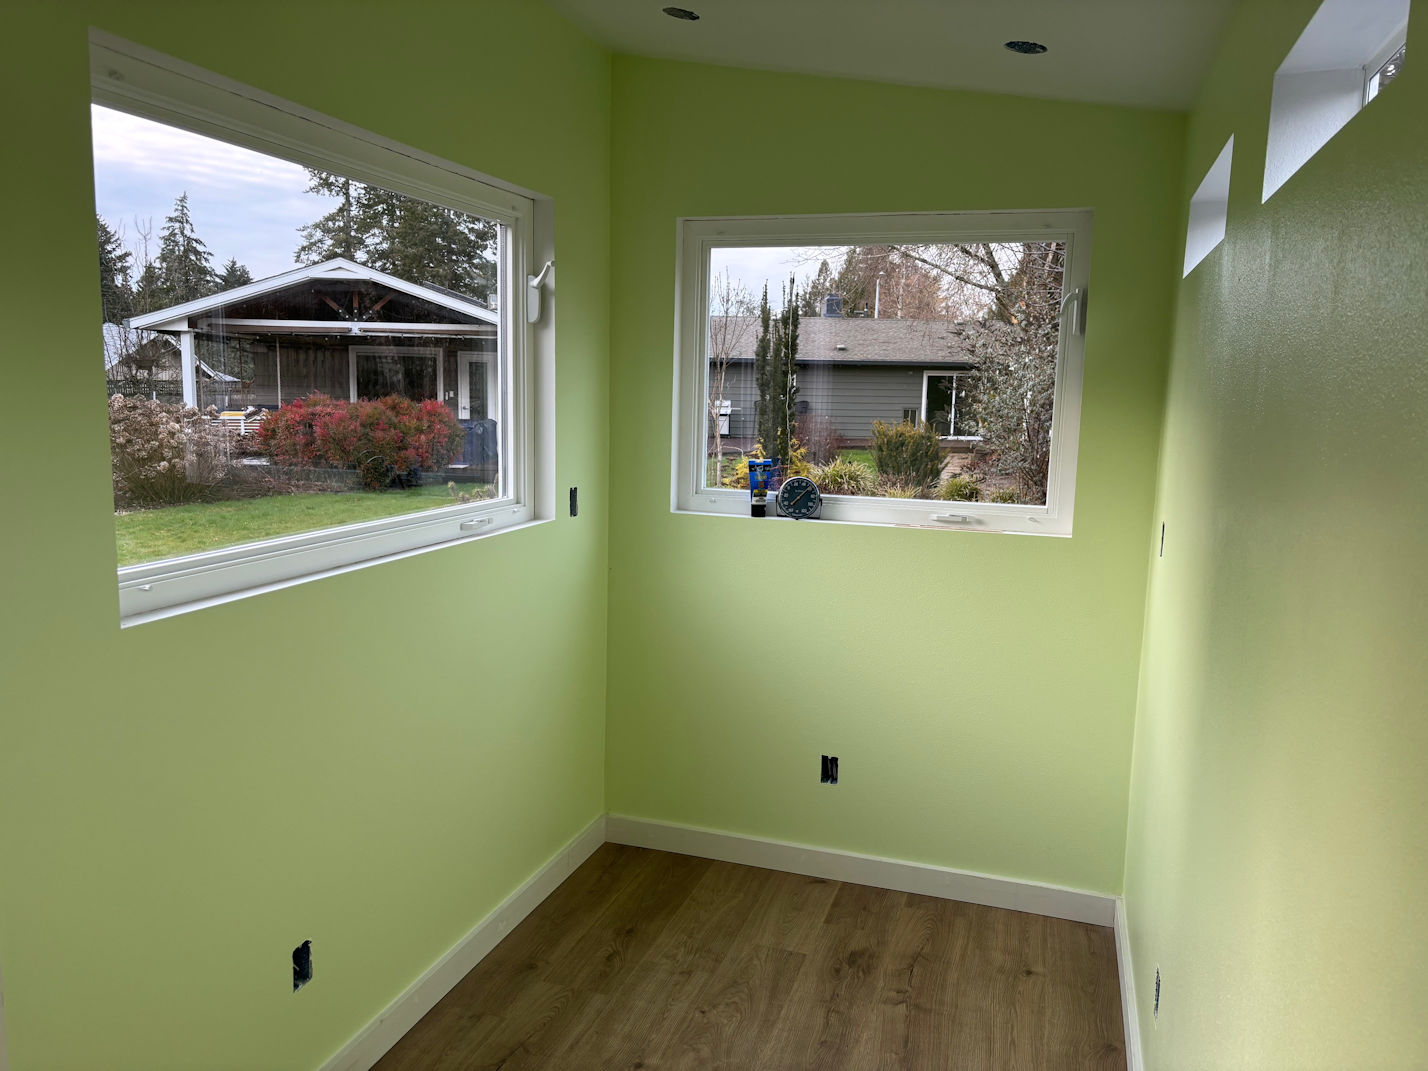
The contractor finished the floor in a single day. That has been one fun thing about such a tiny space: each stage goes quickly. I think the floor is beautiful. He also put trim around the floor and door that will need me to sand and paint.
I called Igor and said we are ready for him to finish the electric, but he has been busy. I hope to see Igor next week. While I wait, I decided to do the ceiling. My plan was to put wood laminate on the ceiling too, but a Lowe’s employee explained to me that gravity would work against it. I did some internet research using the search terms “ceiling tile,” hoping to find a product that looked like wood to go on the ceiling. Instead, the Internet showed me this:

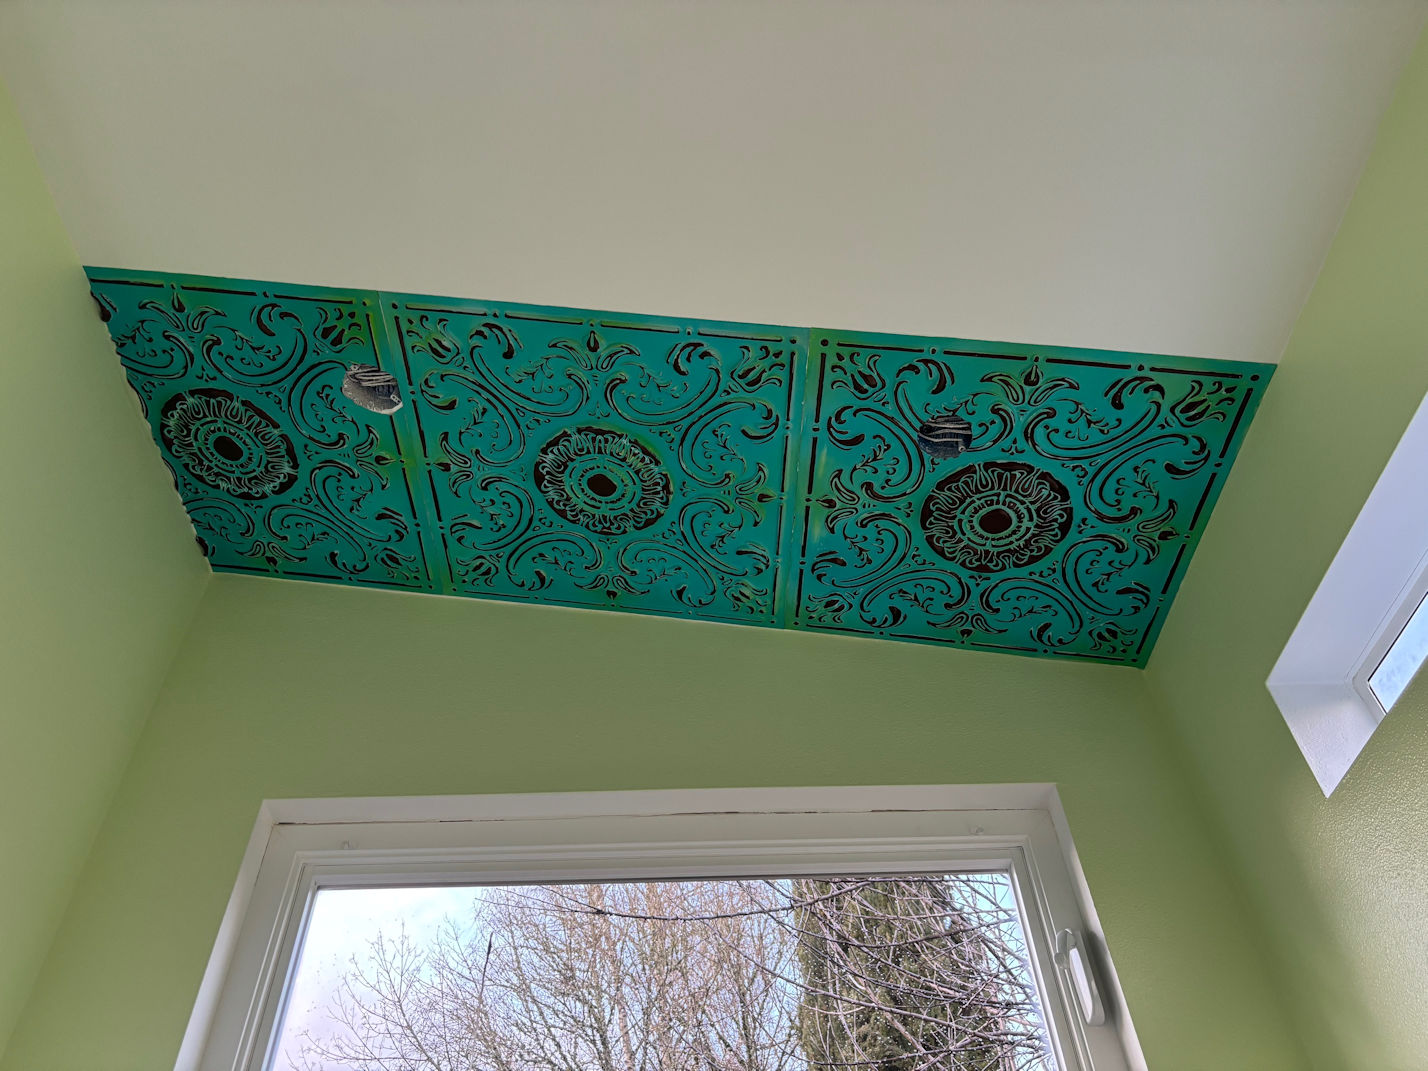
I had no idea these things were still sold. They are not metal, as the vintage ceilings in historic buildings are made of. These are plastic! They are shaped with scissors. They are affixed with glue. I could hardly believe how easy that sounded. And it ended up being so easy. I began one evening around 4 pm and after gathering all my supplies and figuring out how to get going, I finished only three tiles before it was too dark to work.
The next day I finished the ceiling.
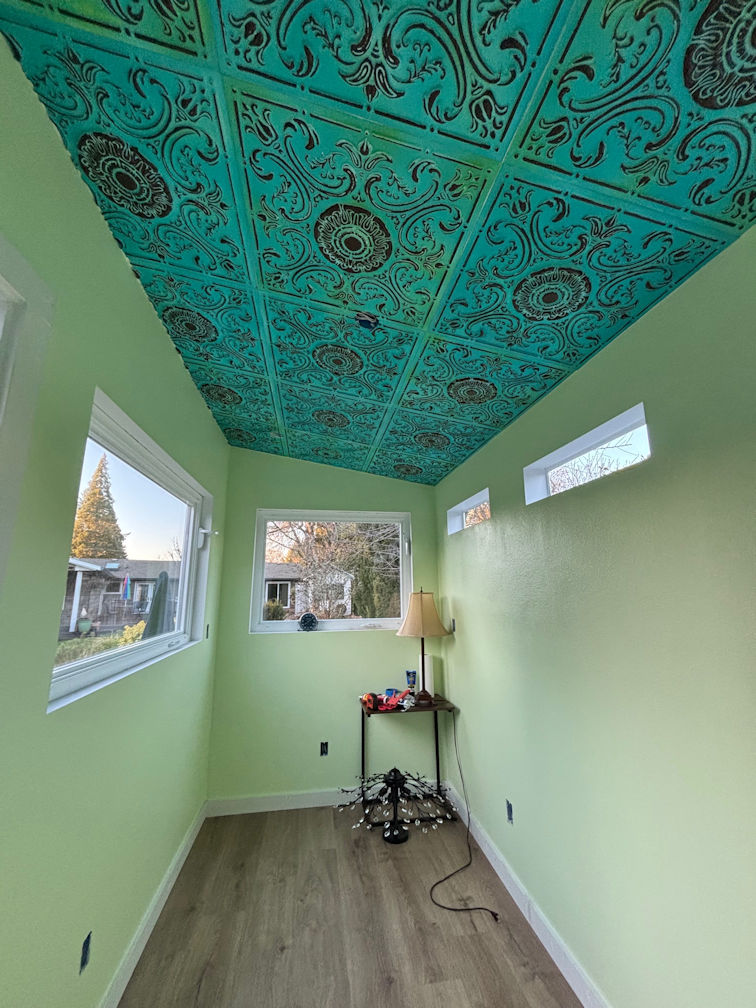
For spotting something online and purchasing it on the spot, I am thrilled with how the blue/green tiles match the walls. The next day my chandeliers arrived. You can see one there, on the floor. I bought two of them and will ask Igor to put them up for me when he comes.
Everything in here is inexpensive faux materials. I want it took look magical and fun, but not cost too much. There are lots of companies happy to build a perfect back yard office for you, but the cheapest quote I could get from any of them was $45,000.00. We have spent a fraction of that. It’s not the same quality, but it’s good enough and I am so excited to begin using it.

After weeks of rain, we got two dry and sunny days that reached 60 degrees (15.5 C)! It felt like summertime. I re-applied the second coat of grey paint, then I put on the white trim paint. In the photo above you see the awning we needed because rain was getting inside every time we opened the door. (Please also note the Capybara Crossing sign on Pedro’s shop. So funny. Cabybaras are his favourite animal.)

Love the colours Crystal. A great job on everything. Shame about the Wisteria but it will grow back. I like Capybaras too. I wanted one for biological control of the Water Hyacinth on a wetland I used to help manage. I was told the Zoo doesn’t rent them out 😂
ha ha ha. But at least you asked. 🙂
We are waiting for “The Revenge Of the Wisteria”! Coming as soon as the growing season starts.
Ha!! I hope I remember to use that as my title! I hope so. I guess I remember how that thing grows fast…but it has been dormant under my scrutiny for months and I appreciate your encouragement.
Very well done. You will see in May how capable the wisteria is of reviving
Thank you for the encouragement! As I told Lou, I recall thinking it was unassailable, but now that I look at it, in wintertime, I’m beginning to doubt. I’m sure you are right though, and I’ll have fun with it soon. And then…probably begin cursing it soon after that, ha ha.
Love how much work you put into this! What a cool room. I’m envious! My question now is how are the acoustics? I can’t wait to see the finished product!
Bonnie, I think the texture of the ceiling cuts down on the echo, which is not too bad. My hopes are to put in decorative trim and moulding, and rugs, and fabric wall hangings, and when it’s done it will likely sound pretty quiet. Right now, the heater and the de-humidifier run all the time, so it is not quiet.